Working with modifiers
Modifiers exist to allow a server or cashier to provide specific instructions for how to prepare an item. This includes special requests, such as 'Lite Mustard' and 'No Mayo,' a requirement such as meat temperature, 'Steak - Medium Rare,' or an option on a side, such as 'Salad - Ranch Dressing.' Modifiers also allow you to charge extra for additional ingredients, such as 'Add Bacon.' Modifier groups enable you to easily locate modifier items on the Point-of-Sale (POS).
Using modifier codes
Aloha Cloud allows you to use pre-defined modifier codes, such as No, Add, Lite, and On Side, to provide additional kitchen instructions to modifier selections.
-
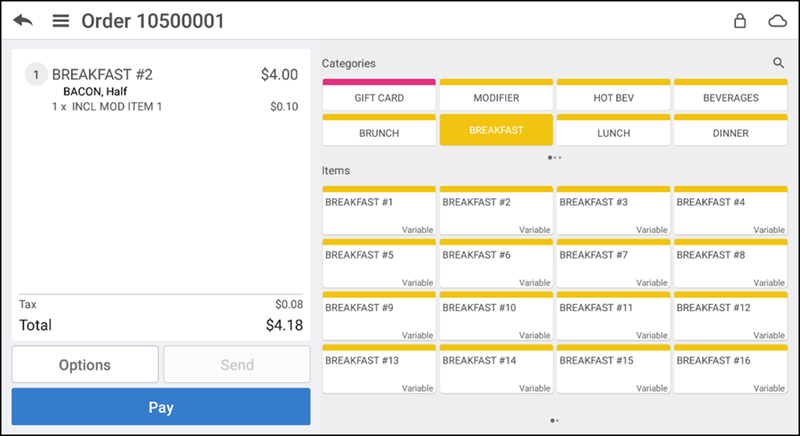
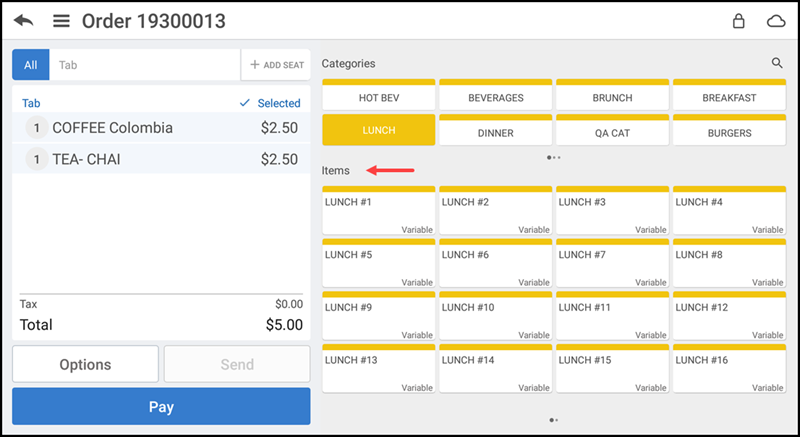
Ensure the guest check is active on the order entry screen.
-
Tap an item to add it to the guest check.
-
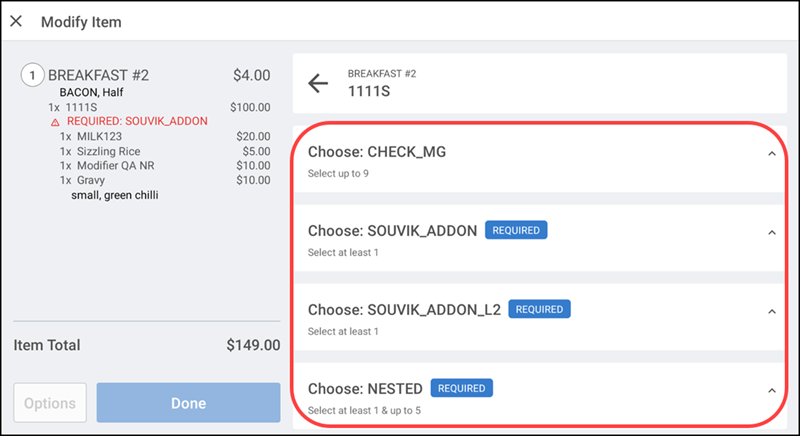
Tap the item in the order ticket window. The Modify Item screen appears. By default, the required modifier groups appear at the top during modifier selection and auto-collapse after the selection. Also, the optional modifier groups appear in collapsed view.

-
Expand the modifier group and make the optional modifier selections, if any.
-
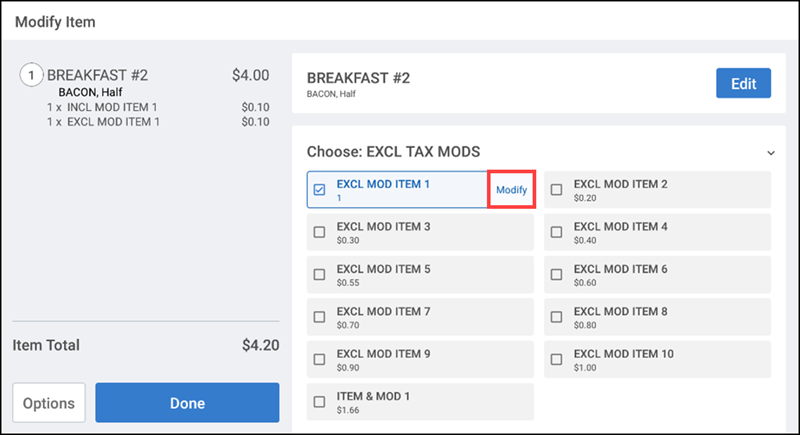
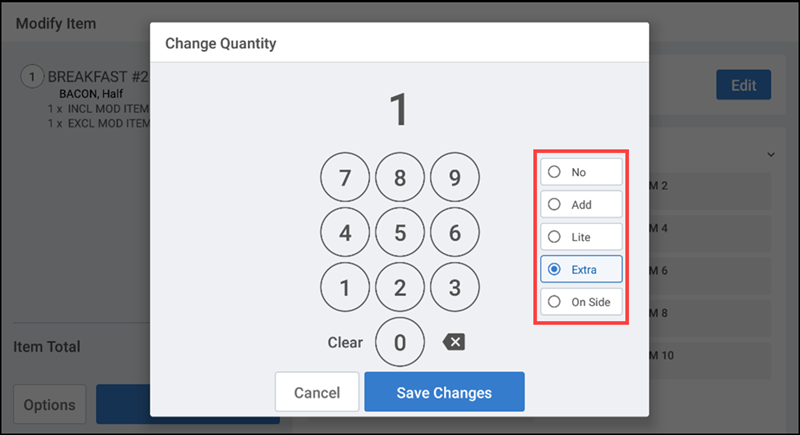
Tap Modify to change the quantity. The Change Quantity screen appears.
-
Tap No, Add, Lite, Extra, or On Side buttons and then make the customer selections.
Note: When you select 'No,' the keyboard to modify the quantity is disabled and the quantity is set to '1.' 'No' appears in red and bold within the item summary panel on the left.
-
Tap Save Changes.
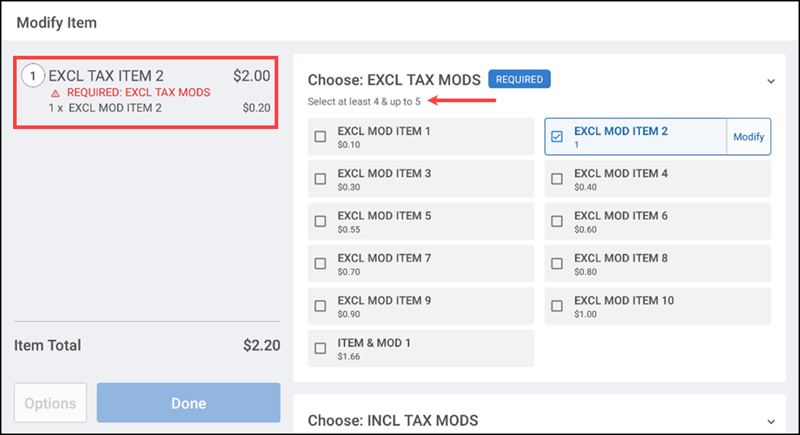
Applying forced modifiers
When you select an item with at least one forced modifier, the system defaults to the entry of the forced modifiers. You cannot leave the order until you select all outstanding forced modifiers. Items for which you must select a modifier, appears with a red badge; upon the successful selection of a modifier, a green badge appears. And for the optional modifiers, a badge does not appears.
-
Ensure the guest check is active on the order entry screen.
-
Tap an item to add it to the guest check. If forced modifiers exist for the item, the ' Modify Item' screen appears.
-
Make the forced modifier selections.
Some items contain default forced modifiers, such as ' Fries,' or ' Medium.' To change the default modifier, tap the modifier and then tap Delete. When you remove a default forced modifier, a red badge appears next to the forced modifier group of the item, and it is necessary to make another selection.
-
Make the optional modifier selections, if any. Tap the No, Add, Lite, Extra, or On Side buttons and then make the customer selections.
-
Tap Done.
Applying nested modifiers
Nested modifiers allow you to modify menu items in the POS with up to two levels of modifiers. The first level modifies the item. The second level modifies the first level modifier.
Reference: Before you can apply nested modifiers to an item in the POS, you need to enable the feature in Back Office. Enabling the nested modifiers feature has no impact on your ability to configure nested modifiers in Back Office; however, if you do not enable the feature, you are unable to apply nested modifiers to an item in the POS. For more information, refer to "Nested Modifiers."
For example:

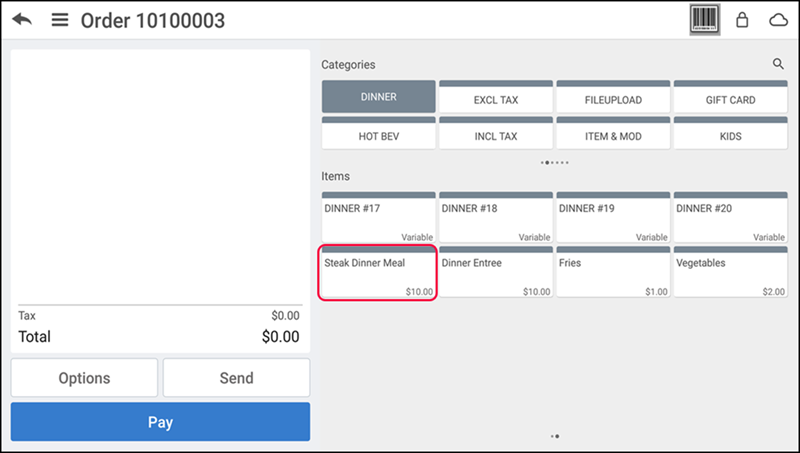
For the Steak Dinner Meal (menu item), once you select Salads (first level modifier group - SIDES), it directs you to choose a dressing modifier (second level modifier group - DRESSINGS).
-
Navigate to the order entry screen.
-
Select the category under which the Steak Dinner Meal menu item exists -OR- use the Search feature to locate the Steak Dinner Meal.
-
Tap the Steak Dinner Meal item to add it to the guest check. The Modify Item screen appears with the SIDES modifier items already added to the check. These items appear in blue to indicate they are already added; however, you can click Modify to change the quantity of each, up to a maximum of three. The DRESSINGS modifier group for the Salads item indicates it is still a required entry.
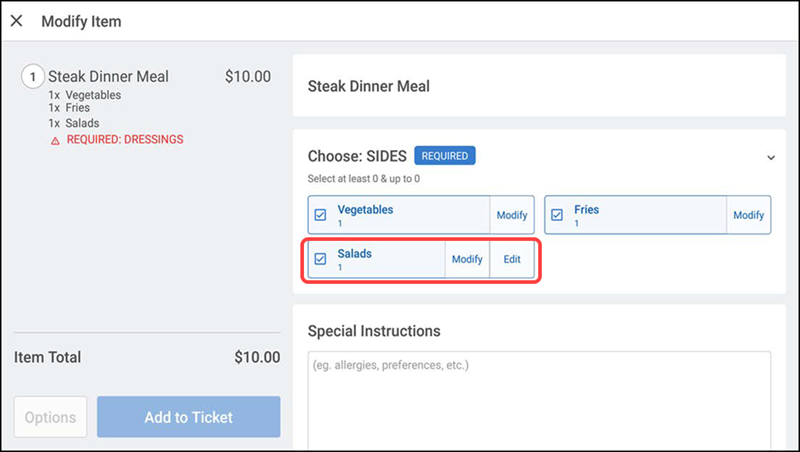
Note: The Edit button on a modifier selection indicates the modifier has second level modifiers you can apply to the item.
-
Tap Edit located on the Salads modifier in the Modify Item screen and the DRESSINGS modifier group appears.
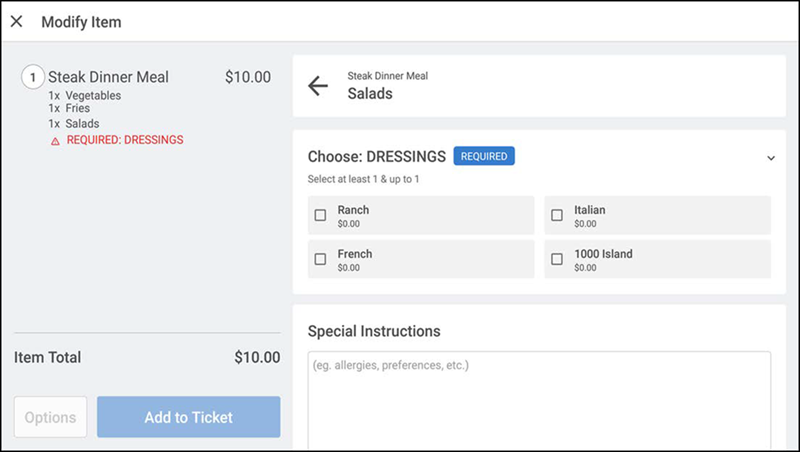
-
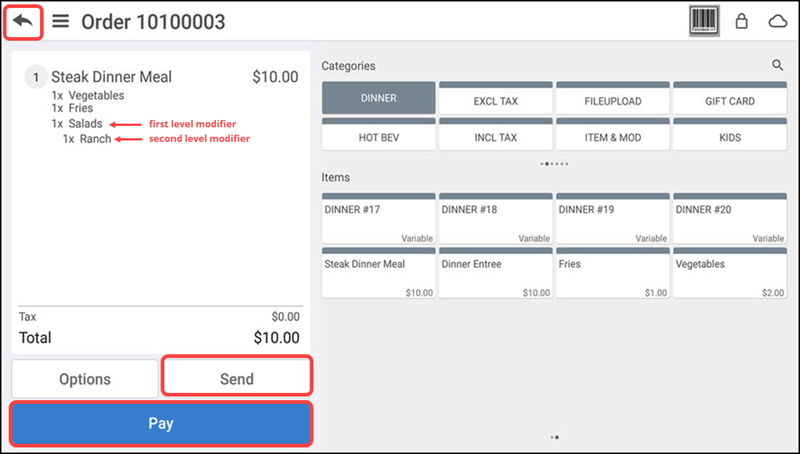
Tap a dressing choice and tap Add to Ticket. The nested modifier appears indented under the second level modifier on the check, for easy identification.
-
Tap Send to send the order to the kitchen.
-
To keep the check open for later payment, tap the back arrow in the top left corner, type a name for the order or accept the system assigned order number, and tap Save Order. When the guest is ready to pay, select the check from the open orders screen, tap Pay, and close the check as normal -OR- to apply payment immediately, tap Pay and close the check as normal.